PiSugar3 Air
PiSugar3 Air is a lightweight variant of the PiSugar 3 model. It keeps the PiSugar 3 power-management, RTC, I2C, UPS, button, and Type-C charging features, but removes the built-in battery and replaces it with a pluggable battery connector.
Users can choose and connect their own single-cell 3.7V lithium battery according to the size and runtime requirements of the project.
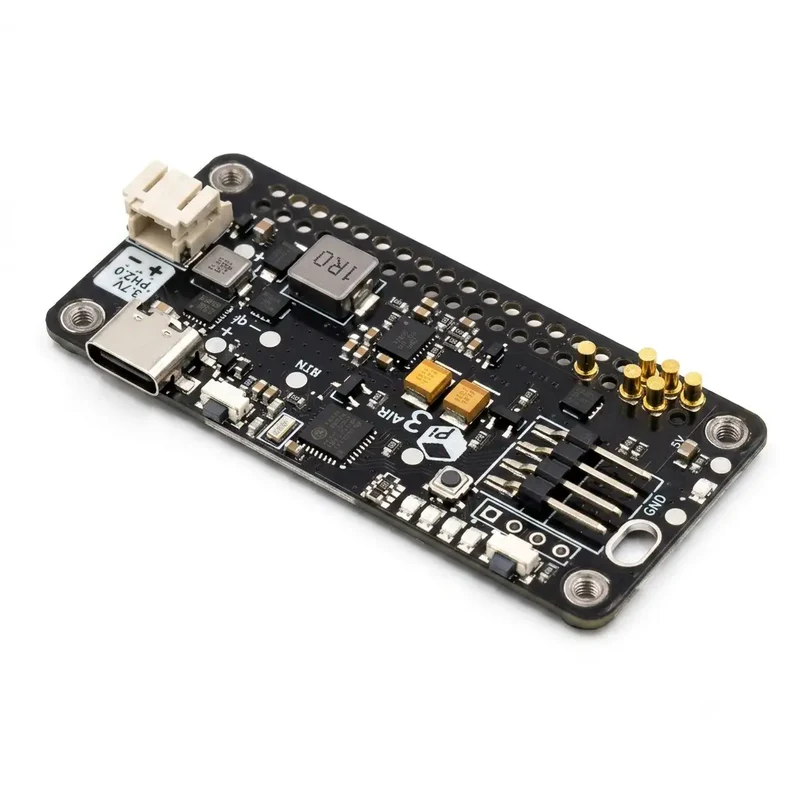
PiSugar3 Air must be used with a single-cell 3.7V lithium battery only. Check the battery polarity marks on the board before connecting a battery. Reversed polarity, damaged batteries, or unsupported battery packs may damage the board or create a safety risk.
Hardware SPECS
- PowerIC: Standalone MCU
- RTC: DS3231, stimulated by MCU
- Type-C: charging port, with E-mark support
- Pluggable battery connector for user-selected 3.7V lithium battery
- Tap Power Button
- Programmable Tap Button
- Extension Interface: I2C interface, 5V output
Electrical Specifications
| Electrical Specifications | PiSugar 3 Air |
|---|---|
| Input | 5V-3Amax |
| Output | 5V-3Amax |
| Battery capacity | User-selected 3.7V cell |
| Communication interface | 0x57/0x68 address |
| Size of PCB | 65mmX30mm |
Support Raspberry Pi Models
| Raspberry Pi Model | Support |
|---|---|
| Raspberry Pi Zero | Yes |
| Raspberry Pi Zero W | Yes |
| Raspberry Pi Zero 2 | Yes |
| Raspberry Pi Zero 2 W | Yes |
How To Mount
PiSugar3 Air uses the same mounting method as PiSugar3.
Mounting Steps
- Make sure the PiSugar3 Air is powered off.
- Remove the protective film on the screw nuts of the PiSugar3 Air board.
- Align the four screw nuts of the PiSugar3 Air board with the Raspberry Pi board (PiSugar board under the RPI), the pogo pins on PiSugar3 Air and the RPI's GPIO should be at the same side, and press the RPI board down gently.
- Use the provided screws to secure the PiSugar3 Air board to the Raspberry Pi board.
- Connect a single-cell 3.7V lithium battery to the battery connector, checking the polarity marks before powering on.
Software Installation
Run the following script on your pi:
wget https://cdn.pisugar.com/release/pisugar-power-manager.sh
bash pisugar-power-manager.sh -c release
Please select the PiSugar3 model when prompted.
PiSugar3 Air, PiSugar3, and PiSugar3 Plus should all be selected as PiSugar3 during installation.
After finished, you can manage the battery by visiting http://<your raspberry ip>:8421 in your browser.
User Guide can be found here.
Battery Selection Notes
PiSugar3 Air is designed for projects where the built-in 1200mAh battery size is not ideal. You can select a battery based on your enclosure, runtime, and weight requirements.
- Use a single-cell 3.7V lithium battery.
- Do not connect multiple batteries in parallel.
- Check connector polarity before plugging in the battery.
- Use quality batteries from reputable manufacturers.
- Do not use damaged, swollen, or unknown batteries.
If you use a battery capacity that differs from the standard PiSugar3 battery, you may need to adjust the software battery curve. See Custom Battery Capacity for calibration steps.
I2C Datasheet
PiSugar3 Air uses the same I2C interface and command set as PiSugar3. For more details, please refer to PiSugar 3 I2C Datasheet.
RTC on board
PiSugar3 Air has an RTC (stimulated by MCU), which can easily be used by hwclock. Please refer to PiSugar 3 RTC Guide for more details.