PiSugarS Series
PiSugar S (Plus) offers an optimized power solution for Raspberry Pi, featuring a streamlined design similar to PiSugar 2, while focusing on essential hardware functionality.
PiSugar S (Plus) does not support data communication. If you need to get battery status, please use PiSugar 2 or PiSugar 3 series.
Hardware Specifications
- TypeC charging port (Alternative MicroUSB port for Plus version)
- Power Switch
- Start up button
- Auto Startup function switch
Electrical Specifications
| Electrical Specifications | PiSugar S Plus | PiSugar S |
|---|---|---|
| Input | 5V-3A max | 5V-3A max |
| Output | 5V-3A max | 5V-2.5A max |
| Battery capacity | 5000mah | 1200mah |
| Size of PCB | 65mm x 56mm | 65mm x 30mm |
Support Raspberry Pi Models
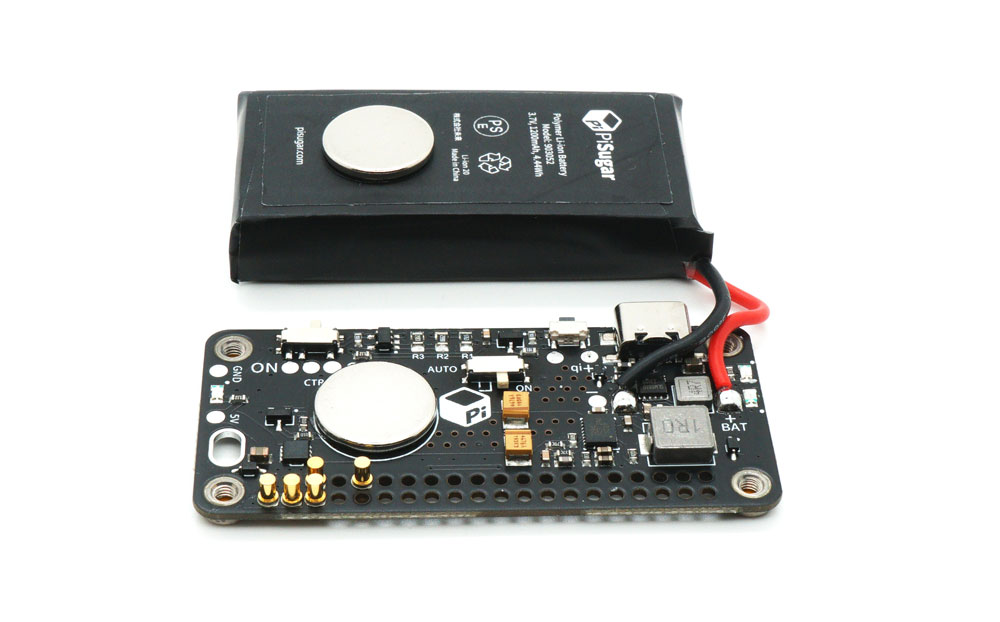
PiSugar S
| Raspberry Pi Model | Support |
|---|---|
| Raspberry Pi Zero | Yes |
| Raspberry Pi Zero W | Yes |
| Raspberry Pi Zero 2 | Yes |
| Raspberry Pi Zero 2 W | Yes |
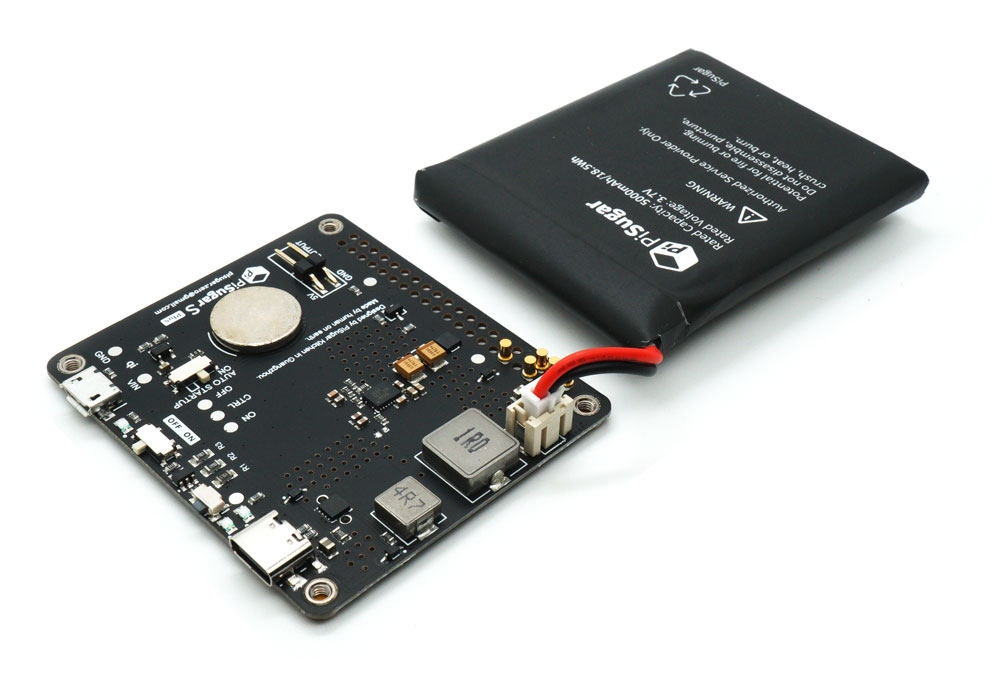
PiSugar S Plus
| Raspberry Pi Model | Support |
|---|---|
| Raspberry Pi 2 | Yes |
| Raspberry Pi 3A | Yes |
| Raspberry Pi 3B | Yes |
| Raspberry Pi 3B+ | Yes |
| Raspberry Pi 4B | Yes |
| Raspberry Pi 5 | Not Supported |
Due to changes in the boot process of Raspberry Pi 5 compared to previous models, PiSugar S Plus cannot automatically power on the Raspberry Pi 5 after a soft shutdown. That's why we mark it as Not Supported.
If you are using Raspberry Pi 5, we recommend PiSugar 3 Plus for a better experience.
How To Mount
PiSugar S
PiSugar S Plus
Mounting Steps
- Make sure the PiSugarS (Plus) is powered off.
- Remove the protective film on the screw nuts of the PiSugarS (Plus) board.
- Align the four screw nuts of the PiSugarS (Plus) board with the Raspberry Pi board (PiSugar board under the RPI), the pogo pins on PiSugarS (Plus) and the RPI's GPIO should be at the same side, and press the RPI board down gently.
- Use the provided screws to secure the PiSugarS (Plus) board to the Raspberry Pi board.
Hardware Installation
- Turn the power switch to off
- Attach pi-zero's back to the pin side of PiSugarS
- Tighten the four screws (M2.5) from the pi-side
- Turn on the power switch and enjoy!
Auto start up function and custom button
Since PiSugar S and PiSugar S Plus use the I2C SCL pin to start up the Raspberry Pi system, the automatic startup function cannot be used together with I2C communication.
If you need to use Raspberry Pi's i2c-1 bus, please turn the auto switch to OFF.
Turn on the function switch
- If the external power is restored during the Raspberry Pi system shutdown, the system will be waked up.
- If external power supply is available, the SCL pin is low level.Otherwise, it will remain high.
- Since SCL is low during the existence of external power supply, I2C communication cannot be used.
- Because they use the same wake-up pin as the custom button, they interact with each other.
Turn off the function switch
- Whether the external power supply is connected or not does not affect the SCL pin, and will not wake up the system.
- Pressing the button will trigger SCL to low level, and if the Raspberry Pi is off, it will wake up the system. If the Raspberry Pi is turned on, it can be used as a custom button.
- Because SCL is not continuously pulled down, I2C functions normally.
Example script for custom button
https://github.com/PiSugar/pisugar-power-manager-rs/blob/master/scripts/PiSugarSButtonActive.sh
Battery protection
When the battery voltage is lower than 3V, PiSugar S will shut down immediately. It will not turn on again until the battery voltage up to 3.6V.
Both threshold voltages can be adjusted by rewinding the resistor on the circuit board, but we highly recommend do not modify them, If you really have such demand, please contact us.
PCB instructions
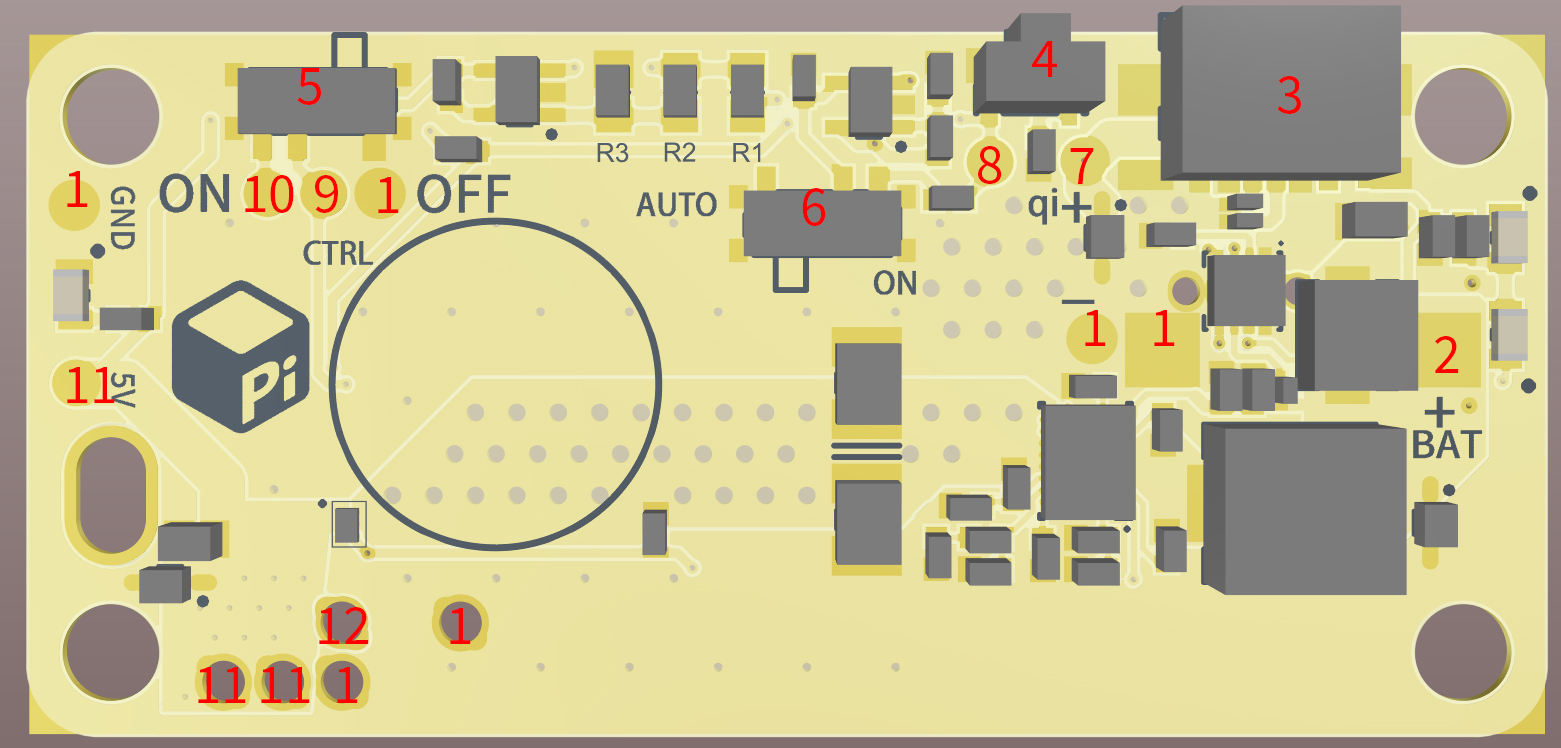
PiSugarS PCB
PiSugarS Plus PCB
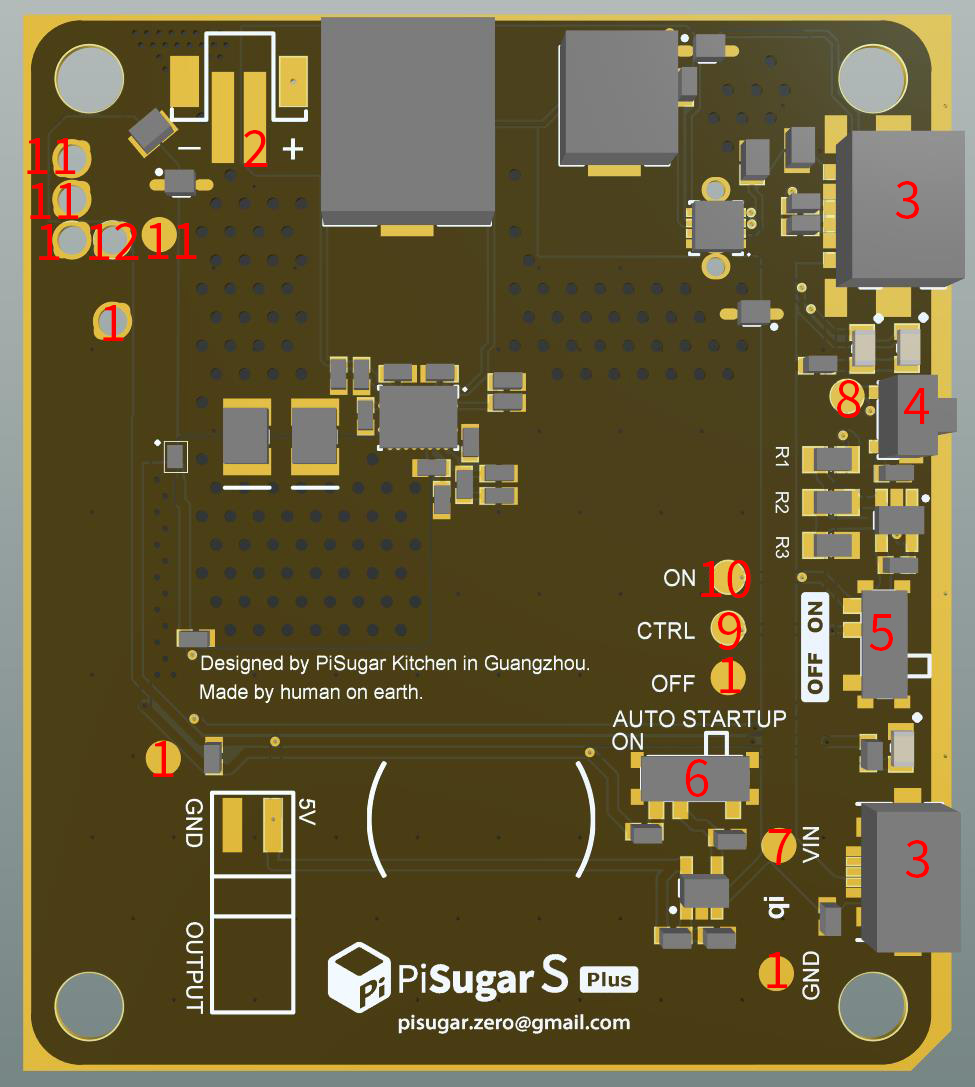
| Position | Name | Description |
|---|---|---|
| 1 | GND | PiSugar's GND, 0V, all GNDs are connected, if connected to the Raspberry Pi, also directly to the Raspberry Pi's GND |
| 2 | BAT | Battery Positive, 3V-4,2V |
| 3 | USB Input | Input voltage 4.5V-5.2V |
| 4 | Custom function button | See the function description above |
| 5 | Power switch | |
| 6 | Auto startup switch | See the function description above |
| 7 | 5V Input Pad | Connect to USB interface 5V input |
| 8 | Custom Button Pad | Trigger custom button function when connected to GND(PAD:1) |
| 9 | Power switch Pad | Power om when connected to ON pad(PAD:10) |
| 10 | Power On Pad | |
| 11 | 5V Output Pad | Connected to system 5V output, connected to Raspberry Pi 5V |
| 12 | SCL | Used for functions such as automatic startup, button startup, acquiring external charging status, connected to Raspberry Pi GPIO3 |
3D Printed Case
PiSugarS (Plus) and PiSugar2 (Plus) share the same dimension therefore you can use PiSugar2's cases.
Basic components (for zero): https://github.com/PiSugar/PiSugar/tree/master/model2
Other basic components (for zero): https://github.com/PiSugar/PiSugar/tree/master/model
Basic components (for plus): https://github.com/PiSugar/PiSugar/tree/master/model_pro
Lids for piHats (for zero): https://github.com/PiSugar/pisugar-case-pihat-cap
Notice
PiSugar S and PiSugar S Plus use I2C SCL gpio to startup the RaspberryPi system, so the automatic startup function and the custom button cannot be used together with I2C communication
Certificate
Please refer to: https://github.com/PiSugar/pisugar-documents