PiSugar2 Plus
Building on the success of powering Raspberry Pi Zero, we've applied the same technology to power larger Raspberry Pi models.
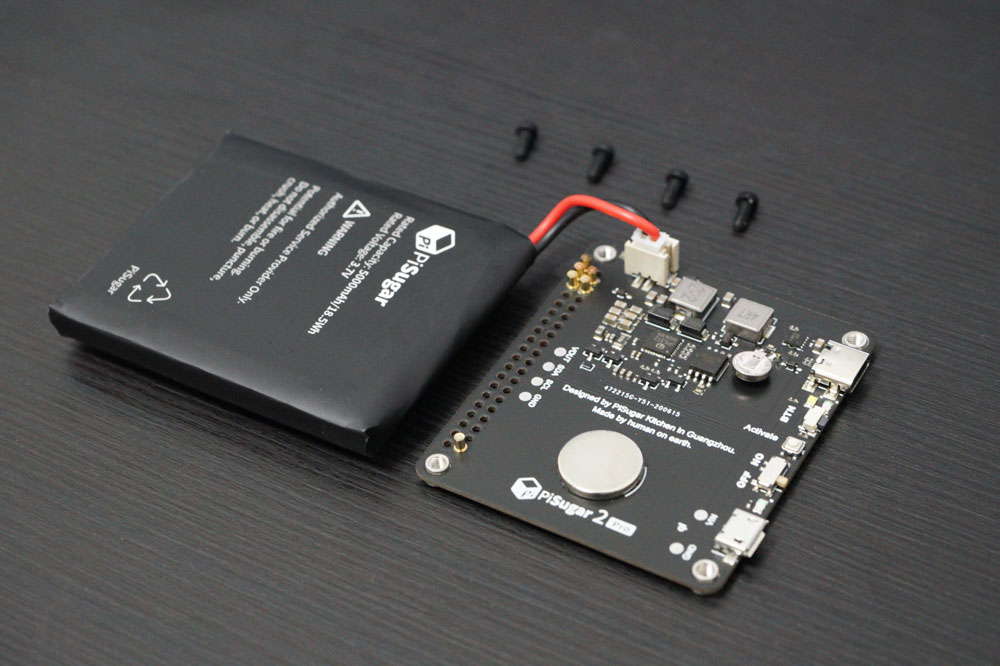
So here comes PiSugar2 Plus(Pro), a special PiSugar version for Raspberry Pi 2/3A/3B/3B+/4B. It's designed with the same architecture as PiSugar2, with a bigger size and some additional features.
PiSugar2 Plus use I2C address 0x75 and 0x32 to communicate with RPI.
Make sure you are not running any PHAT or other program occupying i2c address 0x75 and 0x32. Writing unexpected data into this two address will cause damage.
Hardware SPECS
- PowerIC: Injoince IP5312
- RTC: SD3078
- Type-c: charging port, with E-mark support
- MicroUSB: charging port
- PH2.0 Battery Plug
- Physical Power Switch
- Programmable Tap Button
Electrical Specifications
| Electrical Specifications | PiSugar 2 Plus |
|---|---|
| Input | 5V-3A max |
| Output | 5V-3A max |
| Battery capacity | 5000mah |
| Communication interface | 0x75/0x32 address |
| Size of PCB | 65mmX56mm |

Support Raspberry Pi Models
| Raspberry Pi Model | Support |
|---|---|
| Raspberry Pi 2 | Yes |
| Raspberry Pi 3A | Yes |
| Raspberry Pi 3B | Yes |
| Raspberry Pi 3B+ | Yes |
| Raspberry Pi 4B | Yes |
| Raspberry Pi 5 | Not Supported |
Due to changes in the boot process of Raspberry Pi 5 compared to previous models, PiSugar2 Plus cannot automatically power on the Raspberry Pi 5 after a soft shutdown. That's why we mark it as Not Supported.
If you are using Raspberry Pi 5, we recommend PiSugar 3 Plus for a better experience.
Features
- Simple Installation: PiSugar style, power from the back!
- Battery Plug: You can switch lithium battery by your own
- I2C Data Abilities: get battery data by api or webUI
- Programmable Button: customize a button function base on your project need
- 3A Battery Output (Max 6A in Turbo Mode): meet the requirement of rpi 4B and more power consuming scenarios.
How To Mount
Mounting Steps
- Turn the power switch to off
- Attach pi-zero's back to the pin side of PiSugar2 Plus (Pogo pins on PiSugar2 Plus should be at the bottom of the RPI's GPIO)
- Tighten the four screws (M2.5) from the pi-side
- If the battery level is low or not indicated, please charge it first
- Press the
activation buttonfor 2 seconds (required if the battery was drained or unplugged) - Turn on the power switch and enjoy!
Software Installation
Run the following script on your pi:
wget https://cdn.pisugar.com/release/pisugar-power-manager.sh
bash pisugar-power-manager.sh -c release
Please select the PiSugar2 Pro model when prompted.
PiSugar2 Plus is previously known as PiSugar2 Pro. They are the same product with a new name.
After finished, you can manage the battery by visiting http://<your raspberry ip>:8421 in your browser.

PiSugar Power Manager is develop in Rust and Vue2.0, with high performace (less than 2% pi0 cpu) and exquisite designed webUI.
User Guide can be found here.
API (Same as PiSugar2)
With the software installed, you can also get battery data via udp/uds/websocket in your own way, for example:
echo "get battery" | nc -q 0 /tmp/pisugar-server.sock
echo "get battery" | nc -U -q 0 127.0.0.1 8423
For more details, please refer to: https://github.com/PiSugar/pisugar-power-manager-rs#unix-domain-socket--webscoket--tcp
3D Printed Case
Basic components (for plus): https://github.com/PiSugar/PiSugar/tree/master/model_pro
Charging (Same as PiSugar2)
Please use PiSugar's type-c or micro USB port for charging. If you use pi0's USB port it won't charge PiSugar, and PiSugar will turn off automatically since the external power is enough for pi0 to run.
You can get the charging status from webUI or api.
Schedule Wake Up (Same as PiSugar2)
If you use schedule wake up function, please keep the power switch ON. The battery will turn off as the pi shutdown. The RTC will wake up the battery and the pi at the time you set.
Activation
Activation process is required by IP5312. once the battery level drop to very low or the battery is unplugged, you need to activate it in the next time when you plugin the battery or start charging. Plugin the USB Charging Port and click the circle button (near the tap button) to activate.
Customizing Power Switch
Customizing power switch feature will void the warranty. Please proceed with caution and ensure you understand the implications of modifying the power switch behavior.
If you need to connect your own external power switch, you must remove the original power switch and solder to the three pins of the original switch.

The three pins are: ON, CTRL, OFF.
- When ON and CTRL are shorted, the power is ON.
- When OFF and CTRL are shorted, the power is OFF.
3D Printed Case
Please visit https://github.com/PiSugar/PiSugar/tree/master/model_pro
Certificate
Please refer to: https://github.com/PiSugar/pisugar-documents